The Oreo Experiment

IMG_8653I’ve been meaning to attempt baking Oreos for years. Like since my Oreo-loving younger son was in middle school (he’s a junior in college now). I had three possible recipes to choose from, but just kept putting it off, seriously, like I said, for years. In fact, I can’t quite even believe I have actually gotten around to doing it.

The three possible recipes in my collection that I was choosing from were Faux-Reos from the King Arthur Flour Baker’s Companion, Homemade Oreos from Joanne Chang’s Flour and this one, America’s Test Kitchen Family Baking Book’s Chocolate Sandwich Cookies (Paige at Lorrabeth.com does an amazing job blogging her gluten free version, complete with original recipe here). The primary difference among the versions was the filling. King Arthur Flour’s filling contained shortening and Joanne Chang’s was more of a traditional American buttercream. America Test Kitchen’s was the simplest of the three and what I imagined might taste closest to actual Oreo filling; the ingredients were confectioner’s sugar, water, and vanilla extract.

IMG_8655The cookie dough and the filling are each rolled into a log and then chilled and sliced 1/8″ thick. Do you know how thin 1/8″ is? It’s quite thin, and I found it difficult to slice straight down so that each slice had the same thickness from top to bottom. I had even more trouble getting the cookies to be round, as you can see from my pictures.

IMG_8657The actual cookie base is America’s Test Kitchen’s Chocolate Butter Cookie recipe, and as you might imagine, are quite tender and fragile. Mine didn’t turn out particularly crisp, although that maybe due the humidity (and possibly underbaking) as much as anything. And while they are tasty (and super sweet), they really don’t taste at all like Oreos to me. As my husband put it, they are too chocolatey to be Oreos. They are terrific with a hot cup of tea but they’ll never replace my store-bought Oreos. Yes, I said it; I actually love the store-bought cookie better than homemade in this case. 🙊
King Arthur Flour June Bakealong: Classic Baguettes

IMG_8641

Yes, I’m a little behind. I fully intended to complete this bakealong during the designated month but I had a lot of “obstacles.” First, I decided that after years of successfully making baguettes without one, now was the time that I absolutely needed a couche to tackle the recipe. And even though I could have easily ordered one online, it somehow was completely logical to make the trip to the King Arthur Flour store in Norwich, Vermont, a hypothetical 3 hours away (really closer to 4 hours each way with real life Boston traffic), to purchase one instead. Which I did. (A big thank you to my darling sons for accompanying me!)

IMG_8355

And then almost as soon as we were back, we were away on vacation for a week. And suddenly it was no longer June. All very much #firstworldproblems.

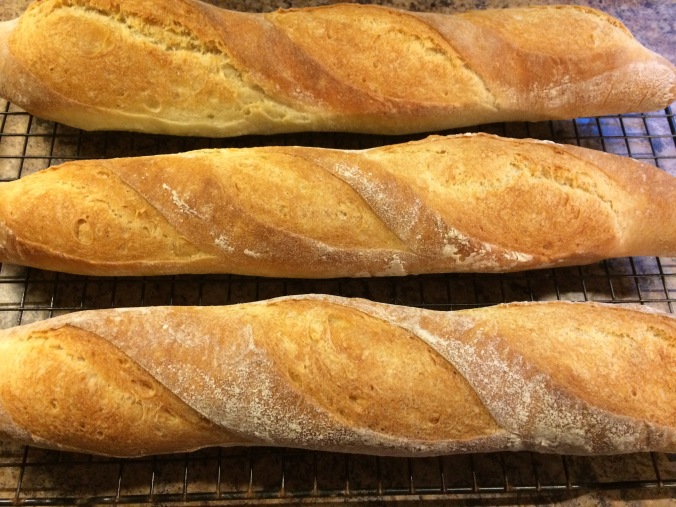
Several years ago, when my bread baking prowess consisted entirely of firing up a bread machine, I first ventured into baguette baking using recipes from the King Arthur Flour site and cookbook. The resulting baguettes were okay — not stellar, but decent enough. Much to my surprise, I was quite pleased with this newer Classic Baguette recipe. Then again, my success this time may also have a little to do with the fact that I have about 9 years of bread baking and a baking and pastry degree under my belt since those novice baking days.

Remarkably, I gave myself to the spirit of the bakealong and actually followed the instructions to the letter instead of doing what I typically do, which is ignore any instruction which conflicts with my previous training. I mixed and kneaded the dough by hand instead of using my stand mixer, as I was demoing the recipe for Cormac who doesn’t have access to such equipment in his apartment. I found that the shaping instructions actually produced nicer shaped baguettes with less effort (i.e. they’re idiot-proof!) than my usual technique. And the couche worked fabulously.

The crust was a bit less crisp than my usual baguettes but Cormac said he actually preferred the softer crust of the King Arthur Flour version. All in all, a worthwhile experience. Now to complete July’s bakealong before August! 😉

A July Tradition: Grilled Asiago Rounds and Zucchini Caponata

IMG_8618

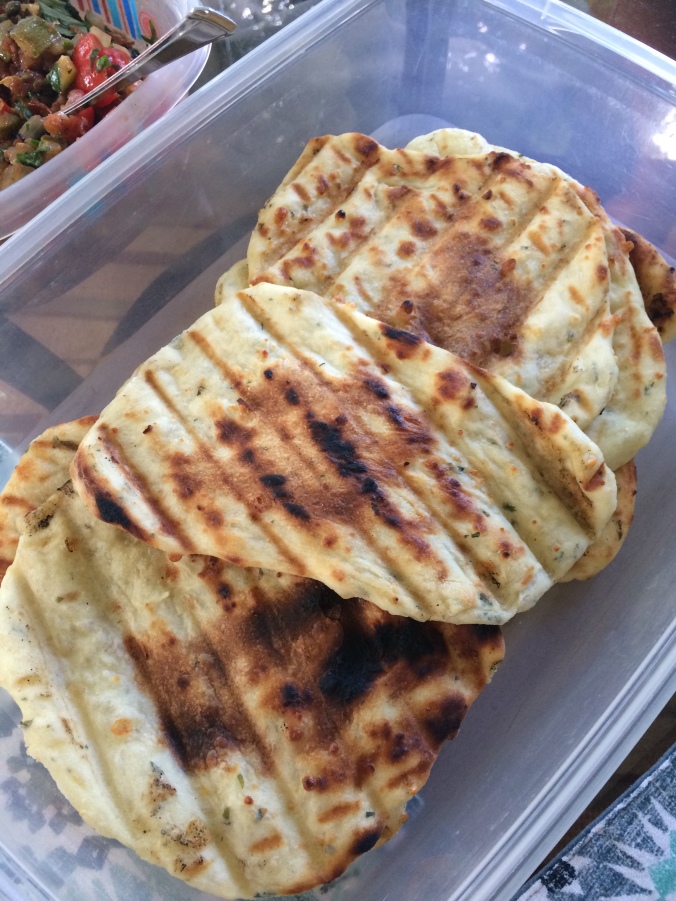
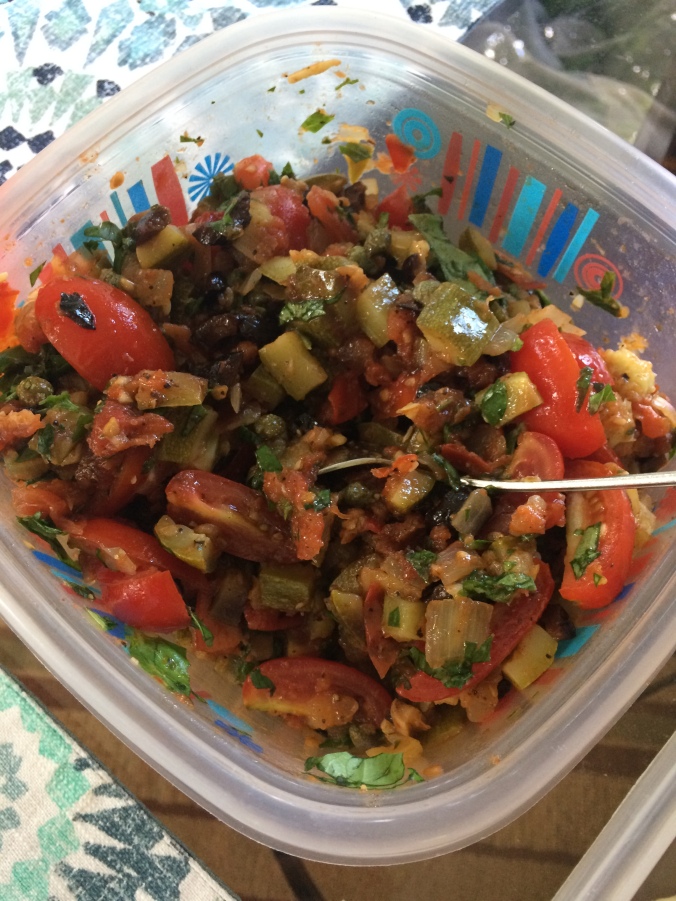
This pairing is a family favorite for us, especially on the Fourth of July, as my blog will attest (I’ve previously blogged about them here, and again here.) The caponata is a breeze but making the grilled breads in particular is a bit of a production. Over of the years, I’ve gotten better at the managing the process and my lovely husband has taken over most of the grilling part (although it’s still much easier with two of us working together on that part as well!).

The recipes are from the King Arthur Flour site — bread recipe is here, caponata recipe is here, and the detailed play-by-play is here. These days, I like to stretch the portions of dough as thin as they will go, about 7″ across, but KAF suggests 4″ rounds which result in plumper flatbreads. I just like how the resulting texture from my version varies from doughy to cracker-like in a single flatbread. I do have to shorten my grilling time accordingly and keep a close eye on each to ensure that they aren’t burning.

Here are all my flatbreads, stretched and queued up to go on the gas grill.

IMG_8617

Love, love, love this zucchini caponata! It can be a great way to enjoy local produce depending on where you live. Unfortunately, most of my ingredients were store-bought this time — it’s too early here in my part of New England for local tomatoes, onions and garlic, and while I could’ve used local zucchini, I had already used up all that was in my CSA share. The basil was fresh from the farm though!

IMG_8619

Birthday Cake Season

IMG_8405

Last month, I made a scrumptious birthday cake for myself. Unfortunately it was gone before I thought to take a photograph of it. But no worries! This month’s family birthday cake is exactly the same! Right down to the decorating. Actually, this month’s decorating may be a little less of a mess, so it’s a win-win to have forgotten to post the earlier cake.

This is my new favorite chocolate cake recipe. I think we’re exclusively a chocolate cake crowd here (although the icings vary) so I’ve tried a lot of different recipes over time. I’ve had this one for a long time (and made it a couple times many years ago), but somehow it didn’t stand out to us earlier. Maybe I’ve gotten better at baking, or maybe my substitution of hot coffee for the boiling water that’s called for makes that substantial a difference; I can’t say.

Hershey (who created the cake) has changed the recipe’s name over the years. My original print-out calls it “Hershey’s Deep Dark Chocolate Cake” but it’s currently called “Hershey’s Especially Dark Chocolate Cake” (follow link for the recipe) on the Hershey’s site. (There is a similar recipe that is otherwise identical, except that it uses natural cocoa powder rather than Special Dark.) My only change to the ingredients in the printed recipe is substituting an equal amount of freshly brewed hot (decaf) coffee for the boiling water. I also advise checking the cakes 3 – 5 minutes early and pulling them out of the oven when the cake tester still comes out with some crumbs; any longer and the cake layers won’t be as gloriously moist as they should be.

I iced the cake with a simple whipped cream… just 12 ounces of COLD heavy cream, 3 ounces of confectioner’s sugar, 1 teaspoon vanilla, and 1 1/2 teaspoons of meringue powder (my trick to stabilize whipped cream that I’m using to top cakes or pies that I expect to have on hand for a few days). I put it all in a mixing bowl and whip with my stand mixer until I’ve reached the stiff peak stage. For more on whipping cream, King Arthur Flour wrote this great post with tips and pictures.

And finally, I’d like to wish my adorable husband PJ a happy, happy birthday!! 😘🎂🎉 Let’s eat cake!!

Friday Night Is Pizza Night

IMG_8318

Way back in the day, my boys took karate on Wednesday and Friday evenings, and every Friday their Shihan would ask if everyone was having pizza for dinner that night. In the beginning, we usually weren’t, but over time, more and more families began adopting the tradition, in part because it was easy and made sense, but also to avoid discussions as to why we weren’t when Shihan clearly felt we should.

It’s been many years since my guys have spent their Friday evenings in the dojo but I still think of Friday night as Pizza Night. The other night, I made my new favorite pizza dough recipe: King Arthur Flour’s The Easiest Pizza You’ll Ever Make (recipe at link). In about 3 hours, you end up with lovely to handle, chewy, elastic dough. The photo below is the dough after rising for 2 hours.

IMG_8315

The instructions say to roll out the dough, but I find it’s much easier to stretch the dough using the backs of my knuckles, letting its weight and gravity do the work. My longtime bread mentor Peter Reinhart demonstrates the technique here. This dough is elastic enough to stretch without tearing, a quality I’ve never really experienced with any other recipe. It almost makes me believe I can do the hand toss like a professional pizza maker!

I made three varieties of pizza. The first was a classic cheese pizza with mozzarella and a touch of parmesan – romano. I made another (pictured at the top of the post) which was inspired by an ingredient combo we’ve had at a number of local places. First the pizza was topped with tomato sauce,  mozzarella and parmesan – romano cheeses, and prosciutto. When the pizza was almost done I threw on a couple handfuls of baby arugula and put it back in the oven for a minute to wilt. I finished the pie off with a drizzle of Trader Joe’s Balsamic Glaze. I love the flavor of the balsamic glaze but I haven’t been able to come up with very many applications for it aside from pizzas and wraps.

IMG_8317

Finally I made one last experimental pie. Instead of tomato sauce, the base was a mixture of French dressing and Sriracha Sauce. I wanted the flavor of Sriracha without all the edge, and French dressing, in addition to being something I already had on hand in the fridge, seemed like it would be pretty compatible and not compete with the strong chile and garlic flavors. My sous chef, AKA my lovely husband, shredded some leftover Thai-style grilled chicken which had been marinated in cilantro pesto (called Gai Yang in Thai) to go on top of the bed of mozzarella (no parmesan – romano cheese on this one), along with chopped fresh cilantro and chopped peanuts. We were pretty pleased with the results but initially I thought it was lacking something I couldn’t quite identify. Maybe some sweetness? It was a fun experiment nevertheless and was awesome as cold leftovers.

IMG_8322

Oatmeal – Dark Chocolate – Cherry Cookies

IMG_8215

This is one of my two favorite discoveries from pastry school. The original formula, as it is called in the industry, is for Oatmeal Raisin Cookies and makes a little over 13 pounds of cookie dough — professional yields, yo. I typically make just an 1/8th of that amount — about 2 1/2 dozen cookies.

I treat this cookie formula as a starting point and seldom just use raisins, as written. Usually I play with the ingredients and do some combination any or all of the following: chocolate (white, milk, dark), fruit (often dried cranberries but occasionally dried blueberries or cherries or raisins), and/or nuts (walnuts, pecans, pistachios, etc.). Dark chocolate and cherries is a combination I’ve never done before but seems pretty obvious (and classic) in hindsight!

I originally bought dried bing cherries from Trader Joe’s to incorporate into my morning oatmeal — the appeal was that it was one of the few dried fruits I could find that did not contain any added sugar. But I found the flavor when eaten straight to be a little too Robitussin-like (perhaps cough medicine more naturally flavored than I had originally thought!) so I started looking for other ways to use them. The bittersweet chocolate chips are my go-to, Ghirardelli 60% Cacao Bittersweet Chocolate Chips. I like how they are flatter than the traditional Nestlé semi-sweet morsels, thus ensuring that every little bite is likely to end up with maximum chocolate flavor. The marriage of the bitter dark chocolate and brightly flavored cherries is wonderful. And thankfully, I no longer think of cough medicine when I taste the dried cherries.

(What’s the Story) Morning Glory? Muffins

IMG_8183

I was toying with making Carrot Cake a few weeks ago for Easter but ultimately shied away from it because I have been cutting down on refined sugar. But it got me thinking about carroty baked goods, like these Morning Glory Muffins from the King Arthur Flour site (the recipe can be found here). The author presents quite a few possible adaptations — for mine, I opted for golden raisins, white whole wheat flour, unsweetened shredded coconut, and wheat germ. Side note: I only soaked the raisins very briefly, for about 3 minutes.

Here are changes I made to the printed recipe after reading reviewers’ comments: I reduced the brown sugar to 1/3 cup and substituted 1/3 cup of unsweetened apple sauce for 1/3 cup of the oil. I checked the baked muffins at 22 minutes (3 minutes early) and they were done. And finally, I got an additional 4 muffins out of the batter for a total yield of 16.

I love these muffins! The overall flavor is only lightly sweet but the little bursts of potent sweetness from the golden raisins really pack a punch. They are not light but are not doorstop-like either. And I can taste all the layers of flavor and the different textures– carrots, apple, raisins, walnuts, coconut, cinnamon, ginger. And I am especially gratified to not be eating something that’s cloyingly sweet or excessively oily.

Lastly, credit goes to my lovely husband (who’s perpetually mad fer it) for rechristening these (What’s the Story) Morning Glory? Muffins. 😍

Pear-Ginger Muffins

IMG_8136

Minis

I’ve been recovering from surgery the past several weeks so I haven’t been doing a lot of baking, but had a hankering for something home baked today so I made Pear-Ginger Muffins (recipe on the Williams Sonoma site here). I underestimated how much prep work it would take to make the batter but powered through thanks to Lin-Manuel Miranda‘s brilliance in the form of the cast album of Hamilton. It magically helped quell my weariness with all the peeling, grating and dicing (cutting up the hard and sticky crystallized ginger has to be the absolute worst kitchen task evah).

I used white whole wheat flour in lieu of the all-purpose flour, and went a little light on the brown sugar (used 5 oz. rather than 5.3 oz.) and a little heavy on the fresh grated ginger (approximately double the 1 tablespoon asked for). I didn’t end up using all the chopped crystallized ginger that I had reserved for the tops of the muffins as it just looked a little excessive.

The recipe yield was supposed to be 12 standard sized muffins but I ended up with a bit of extra batter, so I was able to make 8 mini muffins as well. I baked the minis for 10 minutes which was perfect, but I think baking the full sized muffins for the suggested 15 minutes was a minute or two too long; I really should’ve checked them sooner. The muffins were browner than I would’ve liked and the tester was absolutely crumbless… I suspect they are a little overbaked.

The minis are nicely moist and not too, too sweet. I have to confess I was worried as it seemed like a lot of brown sugar for the amount of flour in the batter, plus there was all that sugar on the crystallized ginger and the sweetness from the pear (I used a red Anjou pear from the much appreciated get well fruit and snack basket that my SIL sent me a couple weeks ago.) Surprisingly, they aren’t crazy gingery even with the three forms (fresh, powdered and crystallized)… ginger zealot that I am, I would’ve enjoyed a bit more!

IMG_8140

Standard sized

(Pain à l’Ancienne) Focaccia Friday

IMG_8054

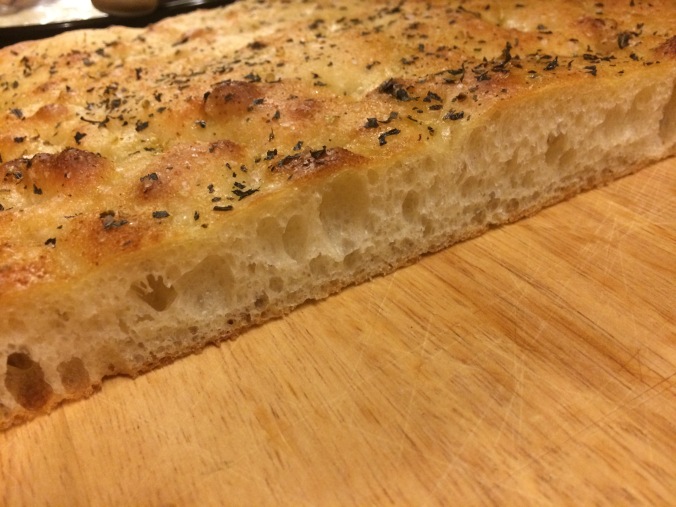
This was made by request for my lovely son Cormac when he was home for spring break a few weeks ago. I started off his break with my go-to, Classic French Bread from Peter Reinhart’s excellent Artisan Breads Every Day; this Pain à l’Ancienne Focaccia from the same book was the follow-up later in the week. Lea of Lea & Jay wrote an excellent post about their experience making (and eating) this focaccia,  and included the recipe, here. As with all recipes in this book, you do have to mix the dough the night before and leave it to retard overnight in the refrigerator, so as long as you allow time for that, you’re golden.

I’ll mention that I did not alter the recipe from the original (as I so often do). I chose not to make the suggested herb oil to top the bread, but instead opted for the quick and easy way out. Right before putting the dough in the oven to bake, I topped it with Trader Joe’s Himalayan Pink Salt (applied with some restraint), as well as garlic powder and freshly ground dried mixed Italian herbs (both somewhat liberally). My rationale behind selecting the dried flavorings over fresh was that they’d be less likely to scorch during baking than if I were to simply sprinkle fresh garlic and herbs on top. It was not at all because I was feeling lazy.

IMG_8059

I found that the focaccia didn’t rise as much as I would’ve expected, especially given that I gave it plenty of time for a final proof and in a warm environment at that, which is sometimes a struggle during cooler months. But there were no complaints from the peanut gallery. All three of my guys loved it — especially Cormac, who ate it for breakfast, lunch, dinner and snack time until it was gone.

Nor’easter Sweet Corn Muffins

IMG_8047

In honor of today’s Nor’easter, Winter Storm Stella, we’re having a hearty vegetable chili for dinner. My go-to recipe for the past 27 years has been from The New Basics Cookbook by Julee Rosso and Sheila Lukins. It’s always been popular with my meat-loving and veggie friends alike, and contains zucchini, red peppers, onions, garlic, chick peas and fennel seeds. A Family Feast posted their experience making the dish, as well as the recipe, here.

I baked my favorite Sweet Cornbread recipe as muffins to serve alongside. I’m not sure how authentic this cornbread is, or where it might be considered authentic. Ratio-wise, it has a fair amount of white flour compared to cornmeal and a generous amount of sugar (as well as a tablespoon of honey) — this is a sweet cornbread! Regardless it’s always a hit with my peeps.

I usually make this bread in an 8 by 8-inch pan, but opted to make muffins today because I thought they’d freeze more easily as muffins and we currently have an abundance of baked goodies in the house. My hubby also pointed out that muffins are easier than hunks of cornbread to take and enjoy on the road.

I scooped the batter with my trusty Vollrath #16 scoop with the blue handle. I use it for all my muffin and cupcake recipes, as it measures out about a 1/2 cup of batter. The recipe makes about 13 muffins (a baker’s dozen) with a wee bit of batter leftover. I baked them for 17 minutes at 350 degrees F and they were perfectly done (no crumbs on the tester), but didn’t turn out as golden as they do when I make it in bread form. I’ll take pale and moist over golden and dry though.

Seems like the snow has now turned to sleet and rain here in our corner of Massachusetts… I’m dreading the rain-soaked snow that awaits shoveling outside. The chili and corn muffins will be a nice reward when we’re done. 🍴