A July Tradition: Grilled Asiago Rounds and Zucchini Caponata

IMG_8618

This pairing is a family favorite for us, especially on the Fourth of July, as my blog will attest (I’ve previously blogged about them here, and again here.) The caponata is a breeze but making the grilled breads in particular is a bit of a production. Over of the years, I’ve gotten better at the managing the process and my lovely husband has taken over most of the grilling part (although it’s still much easier with two of us working together on that part as well!).

The recipes are from the King Arthur Flour site — bread recipe is here, caponata recipe is here, and the detailed play-by-play is here. These days, I like to stretch the portions of dough as thin as they will go, about 7″ across, but KAF suggests 4″ rounds which result in plumper flatbreads. I just like how the resulting texture from my version varies from doughy to cracker-like in a single flatbread. I do have to shorten my grilling time accordingly and keep a close eye on each to ensure that they aren’t burning.

Here are all my flatbreads, stretched and queued up to go on the gas grill.

IMG_8617

Love, love, love this zucchini caponata! It can be a great way to enjoy local produce depending on where you live. Unfortunately, most of my ingredients were store-bought this time — it’s too early here in my part of New England for local tomatoes, onions and garlic, and while I could’ve used local zucchini, I had already used up all that was in my CSA share. The basil was fresh from the farm though!

IMG_8619

Chocolate Stout Cupcakes with Irish Cream Buttercream Frosting

St. Patrick’s Day is a particularly special day in our house, not just because of my darling husband’s Irish heritage but also because 50% of the people in our household are named Patrick. So come mid-March, the Irish tunes go into heavy rotation, the Irish-style brews and corned beef fill our fridge, and my mind turns to chocolate stout (cup)cakes.

This recipe by TrialAndErin is fantastic: the cake is incredibly tender and moist, and the frosting couldn’t be easier to make. For the greatest enjoyment, turn a blind eye to the amount of butter you’re using. Then again, it does make 2 dozen cupcakes so (amount) of butter divided by 24 is… never mind.

I made a few adaptations to the recipe. First off, I have yet to make this recipe with Young’s Double Chocolate Stout as suggested (though it is a terrific beer — my gateway chocolate stout, in fact, twenty-some years ago). I have used Guinness Foreign Extra Stout and O’Hara’s Irish Stout in the recipe — both with great success.

Secondly, I have underage folk devouring these cupcakes so I substitute Baileys (non-alcoholic) Creamer (I call it “Faileys” for Fake Baileys) for the Irish Cream called for. Remember that unlike the beer in the batter, the frosting doesn’t get cooked. It doesn’t taste exactly like proper Baileys, but it approximates the flavor and is still pretty dang good. (I like to pour some in my midday coffee and pretend that I’m a bad girl.)

I have a little tweak for mixing the cocoa powder with the beer and butter that I think works a bit better at avoiding lumps than the original instruction. First off, it’s imperative that you sift the cocoa powder. Next, rather than adding the cocoa powder to the simmering beer and butter, I very slowly whisk the beer and butter mixture into the cocoa powder. It will be very thick and paste-like when you start, but doing it this way minimizes any cocoa lumps. I also let the resulting mixture cool for 10 minutes (it’s quite hot) before adding it to the egg mixture and proceeding with the rest of the batter, as I don’t want to cook the eggs or activate the baking soda prematurely.

Lastly, I recommend that when you check the cupcakes for doneness, pull the cupcakes from the oven when there are a few crumbs remaining on the toothpick. If you wait until the toothpick is completely clean, the cupcakes with be overbaked and on the dry side. And remember to rotate your pans halfway through the bake time and check multiple cupcakes (in different areas of the pan) for doneness. If your oven is anything like mine, the heat (and cooking time) can vary in different spots.

Making green fondant shamrocks with a tiny heart cutter.
Cut a heart in half down the center and voilà! A stem.

In summary: the whole clan LOVED these cupcakes! The stout lends a (predictably) yeastiness to the cake that’s really pleasing and the frosting is sublime. I don’t consider myself a cake person and yet even I was a wee bit weepy when they were all eaten. Confession time: there was a little extra frosting left after icing the cupcakes so a few days later I baked up a single-layer chocolate snack cake and slathered on the leftover frosting. When you’re Irish, St. Patrick’s Day never has to end. Erin Go Bragh!

Happy 2013!

First off, Happy New Year to all. I hope you survived the holiday season with waistline and sanity intact.
One of my goals for 2013 is to resume regular posting (and baking), so here goes. Our house is still recovering from the glut of baked goodies (ours and gifts from others) that we acquired in the past couple of weeks so I haven’t baked anything new this week. I do have a backlog of projects to post though, so that’s not a problem!
Our family’s Christmas Eve food tradition is a dinner of baked ziti, Caesar salad, and Texas Toast, with something rich and chocolatey for dessert after church service. My younger son commented that he was having a hankering for cake so I decided to make the Triple Layer Chocolate Birthday Cake from one of my favorite food blogs, Eat, Live, Run. Jenna Weber is the creator of Eat, Live, Run, and in the past year, it has become my go-to when I need ideas for something to make (savory and sweet). My Pinterest boards are easily 80% Eat, Live, Run repins!
Back to the cake. I used cow’s milk (rather than almond milk) in the cake and vanilla extract rather than vanilla bean in the cake and frosting. I was slightly concerned baking the three layers, since I only have two straight-sided 9-inch cake pans; I used an old supermarket-quality (i.e. sloped-sided) 9-inch pan for the third layer. The batter mixed up great and the layers rose nicely and were pretty level when they came out of the pans. I did put greased and floured parchment rounds on the bottom of each pan because I didn’t want any surprises when it was time to depan the layers. I tested them at the prescribed 40-minute mark and they seemed perfect — sides beginning to pull away, a few crumbs sticking to the toothpick — so I pulled them out then.
No incidents with making the ganache or the frosting… everything went painlessly and I managed to sneak in a 2-mile run while I was waiting for things to cool/set up. The whole cake came together beautifully and I used every last bit of the frosting, thus the sad solitary rosette on the top of the cake! In hindsight, perhaps I should’ve used a smaller tip to decorate, but I was going for speed at that point, and I rarely run out of frosting (most recipes make way too much) so it didn’t occur to me to go light.
The three layers create a MONSTER of a cake. Lift with your knees, peeps!!
Now — the eating of the cake. In hindsight, I’m thinking my layers were overbaked because the cake was a tad dry right off the bat. Next time, I would check them a bit earlier and/or brush the layers with a flavored simple syrup. My guys LOVED the frosting, but were just meh about the ganache between the layers; they couldn’t taste it. I only had enough ganache to do a fairly thin layer between the cake layers; it just didn’t stand up to the dryness of the cake itself. I think if there were more (and the cakes weren’t overbaked) it would have made more of an impact. Also, the cake really could’ve used more frosting (I have never, ever said those words before). The guys suggested that next time I make only two layers, replace the ganache layer with frosting and use the same or more frosting to ice the cake, so that’ll be my plan. I’ll let you know how it turns out!

irish soda bread with raisins and cranberries

I did a little holiday baking on my day off from my internship today.  St. Patrick’s Day is later this week, but I won’t have a lot of time to putter around in my own kitchen on that day so we’re having our Corned Beef and Cabbage tonight instead.  And of course, I had to bake Irish Soda Bread too.  I don’t really eat soda bread with the meal but usually have it with tea (or coffee!) during the week.

Typically, I make American-style Irish Soda Bread — that is, I add caraway seeds.  I just like the way they make the bread taste, although I know they aren’t to everyone’s liking.  This year, however, I opted to try a new twist.  No caraway seeds, but (and this was an epiphany to me) the raisins and dried cranberries are soaked in Irish whiskey!  Tell me, what says St. Paddy’s Day better than a little Jameson’s in your soda bread?

I found the recipe on Serious Eats, and converted the recipe’s volume measurements into weight because I prefer scaling my ingredients to washing a lot of measuring cups.  I also used dried buttermilk powder (I use Saco) rather than fresh buttermilk.  It’s great stuff — you add the powder to the dry ingredients and add the appropriate amount of water when you incorporate the wet ingredients.  Store it in the refrigerator and you don’t have to worry about wasting half-used cartons of fresh buttermilk.  You can also substitute soured milk (1 tablespoon of white vinegar per 8 oz. of milk, stirred and left to rest for 5 minutes before using), but I think the buttermilk powder yields better results.

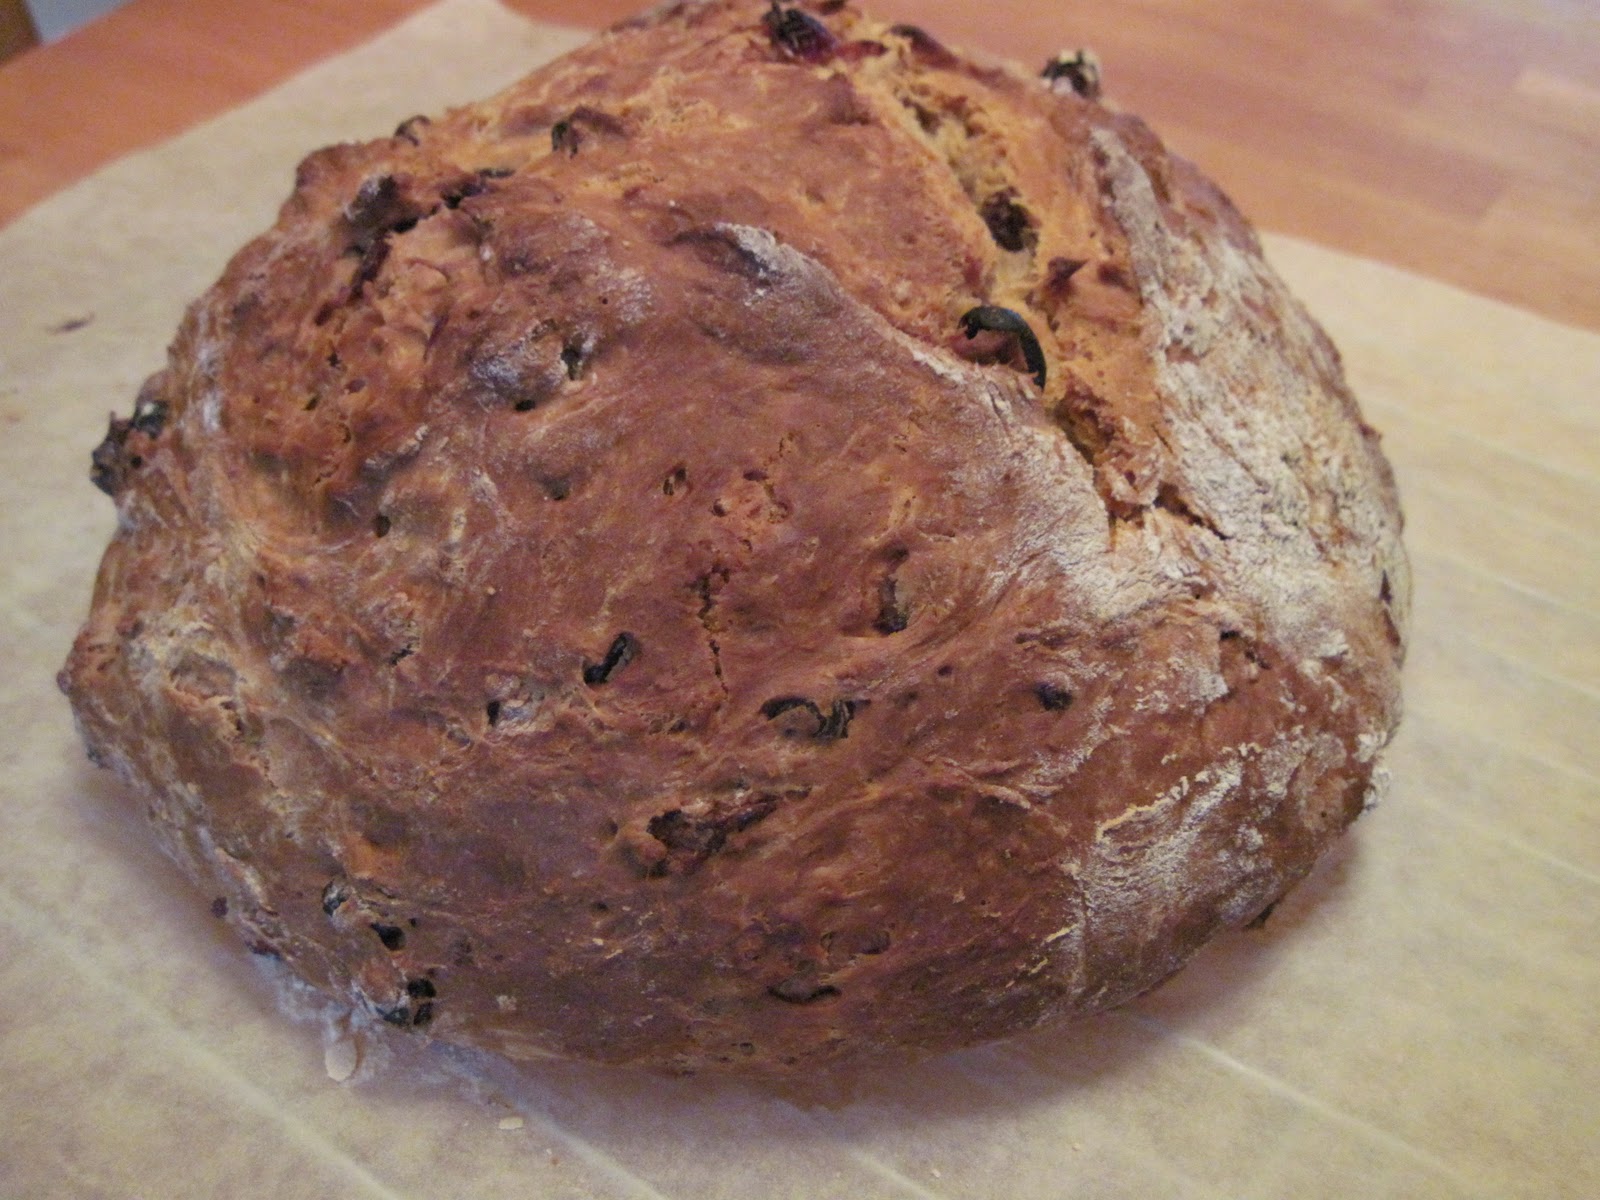
Irish Soda Bread with Cranberries and Raisins
(adapted from Serious Eats)


1/2 cup (2.25 oz.) dried cranberries
1/2 cup (2.75 oz.) raisins
1/2 cup (8 oz.) Irish whiskey (or hot water)
4 cups (17 oz.) bread flour
1 teaspoon baking soda
1 1/2 teaspoons salt
2 tablespoons (1 oz.) unsalted butter
2 tablespoons (1.5 oz.) honey
6 tablespoons (2 oz.) dried buttermilk powder
1 1/2 cups (12 oz.) water

Combine the cranberries, raisins and whiskey (or hot water). Cover and set aside to rehydrate for at least 30 minutes, or overnight.

Preheat the oven to 375 degrees and line a baking sheet with parchment.

In a medium mixing bowl, combine the flour, baking soda, salt and dried buttermilk powder. Whisk to combine. Cut the butter into slices, then work it into the flour with your fingertips until it is fully incorporated. Add the honey, water and the cranberries and raisins with the soaking liquid. Stir with a wooden spoon until all the liquid is absorbed.

Flour your work surface lightly and turn out the dough. It will still be sticky — try to avoid adding more flour. It’s helpful to flour your hands and use a bowl scraper or a spatula blade to help you maneuver the dough around. Form the dough into a 6-8 inch disk about 1 1/2 – 1 3/4 inches high and place it on your prepared baking sheet. Cut an X in the top of the dough across the top, about 1/2 inch deep.

Bake at 375 degrees for 50-60 minutes, until the bread is nicely browned and a toothpick inserted in the center comes out clean. Cool on a rack. If you like a softer crust. cover the bread with a clean kitchen towel as it cools.

Revisiting An Old Favorite

Last summer I discovered a new favorite — grilling flatbreads.  They are quick and simple to make, and so much fun, and everyone loves to eat them.  Yesterday, I made Grilled Asiago Rounds and Zucchini Caponata from King Arthur Flour’s Bakers’ Banter.  Both recipes are so easy and sooooo good.  Check out the links above for the recipes as well as how-to videos.

I was outside grilling the breads yesterday morning so we could take them along with us into Boston for the fireworks.  L. said he could smell them in his sleep.  The last time I made this I thought it lasted a bit longer — maybe a couple of days, but the only reason we didn’t finish it all last night was because I only brought two-thirds of the batch of flatbreads and caponata with us.  We had other goodies as well, and really, who needs that much food for just one evening?  I took a lot of abuse for that decision.  Rest assured, we finished the rest of it today.

happy fourth of july!


I made these for a cookout this weekend. I glazed them with white icing and then dotted the cookies while the icing was still wet with red- and blue-tinted icings. Then I used a toothpick to swirl the colors around. The results were pretty cool-looking — they reminded me of the trails of color that fireworks leave in the sky as they die out.

The cookies themselves were from the Holiday Cookies recipe from The America’s Test Kitchen Family Baking Book. WPR.org posted the recipe here so I won’t repost it, but it’s one I’ve used before. I love it because it’s easy to work with and the cookies are soft and have great flavor. The icing is the shiny cookie glaze from The King Arthur Flour Baker’s Companion Cookbook.

King Arthur Flour’s Shiny Cookie Glaze
(reposted from Serious Eats, with my adaptations)
3 1/2 cups (14 oz.) confectioners’ sugar, sifted
6 tbs. (3 oz.) milk
1/4 cup (about 1.25 oz.) meringue powder
1 tsp. clear vanilla extract
Wilton icing colors

Place the sifted confectioners’ sugar and meringue powder in a medium-sized bowl. Add the milk and vanilla to the sugar and meringue powder and mix on low for 4 to 5 minutes, until the glaze is the consistency of molasses. Adjust the consistency with a tablespoon of water if necessary. Add icing color if desired. Important: keep the glaze covered while working with it to keep it from forming a skin or hardening up.
Use the spoon for apply the glaze to the cookies and spread using the back of the spoon, removing any excess. Place on a drying rack to let the excess glaze drip off and let the glaze harden and dry for several hours or overnight.

And here are some from the “let’s get rid of the rest of the dough and the icing” batch. They were decorated a bit differently!

mother’s day and whoopie pies

Until yesterday, I had never eaten a whoopie pie. Apparently this is something I should be ashamed of. However, even without having eaten one, I had a firm idea of how a whoopie pie should taste. The exterior should be moist and chocolatey. The filling should be sweet, but not cloyingly so, and it should have some lightness to it — kind of like whipped cream, but not exactly. And most of all, it should not contain shortening. Apparently making whoopie pies without shortening is a deal breaker, but I was determined to find out how to make them sans Crisco for my Mother’s Day cookout.

The America’s Test Kitchen Family Baking Book‘s Whoopie Pie recipe calls for filling made with butter, confectioners’ sugar, vanilla, Marshmallow Fluff (or Marshmallow Creme for you folks outside of Fluffland) and a pinch of salt. The recipe is super simple to make — I had a doozy of a cold this weekend and still managed to do a beautiful job if I do say so myself (indulge me, I’m sick). I premade the batter and filling and put them in the fridge overnight, and then scooped and baked the batter in the morning. After cooling them on a rack, I then filled them with the ooey gooey filling and served. The filling wasn’t quite what I expected — it was sweet and sticky and a little overwhelming with its sugary messiness. The pies were pretty big too — only my teenage son was able to eat a whole pie in one sitting and a few of us had trouble even finishing a half. Luckily we are an informal bunch and none of us minded wearing whoopie pie on our hands and faces. For a prettier (and tidier) presentation, I would try baking them in cupcake tins and then filling the centers. But what fun would that be?

susan ziegler’s lemon squares (via ruhlman)

I’m trying to get caught up with my blog posts — it’s been really busy this week and while I continue to bake, I just haven’t had time to post.

Michael Ruhlman is an author, food writer and blogger. His latest book, Ratio, has quite the buzz going in foodie circles right now. I haven’t read it yet, but it’s on my list. He recently wrote a post about his disdain over the use of boxed lemon square mixes. I have to confess, I’ve only ever made lemon squares from a mix — and I thought they were pretty good. But it’s been a few years and I now try to not use boxed baking mixes at all and his post inspired me to make them for Easter. Actually, if it were a perfect world, I would’ve baked a lemon meringue pie but my last attempt was so abysmal I thought it best not to (I can’t get the meringue to not weep, and that makes me weep). Lemon squares are an acceptable substitute.

Ruhlman’s lemon squares (actually Susan Ziegler’s, his childhood neighbor) are equal parts base and curd. He says one can tweak the balance as one sees fit, but 50/50 is fine with me. The finished lemon squares were a little fragile but had terrific flavor — tangy, sweet, buttery. I loved the shortbread quality of the base, and by Day 2 the base had acquired a little bit of a very pleasant crunchiness. The recipe makes 16 fairly small squares, so if I were planning on making enough to share I’d make a second pan.

Chocolate Stout Cake

St. Patrick’s Day is not a day which usually makes me think of dessert, unless dessert is a pint of the black stuff. But recently I became aware of a wonderful creation called Chocolate Stout Cake. I’ve long been a fan of chocolate stouts — Young’s Luxury Double Chocolate Stout has to be one of my all-time favorite after dinner drinks — but I never really contemplated actually making a chocolate cake with a stout. This particular recipe came from the Bakers’ Banter (once again, I was thinking of a particular baking project and voilà, they post their version of it a few days later). Their version makes a huge cake — the three 8″ layers, when assembled, almost touched the roof of my cake carrier dome. Unlike their version, my frosting never set up like a spreadable frosting — it was more of a drizzle-over variety chocolate ganache. No matter… it was yummy. The festive green decorating was for C. who felt that a plain chocolate top was not very St. Patrick-y. The cake itself was dark (presumably from the stout because it was not heavy — in spite of the pound of butter) but light — and you could taste a bit of the stout flavor in the cake itself, although the ganache overwhelmed that flavor when eaten frosted. Most of all, it was a lovely break from all the heavy Wilton-frosted cakes we’ve had of late.